Finalize a schedule
Ensure your team is aware of their scheduling using Publish and Print options.
Publish
-
is only available for stores using TimeShark.
Publishing a schedule makes it available to your employees in TimeShark and TimeShark web portal.
To publish the created schedule:
-
Click on the button to send the schedule to employees.
Publish sends each employee their schedule for the entire week on TimeShark, and enforces any restrictions set in TimeShark controls (like blocking new leave requests for weeks that have been published).
-
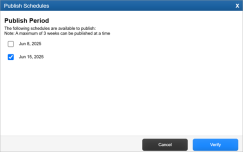
Place a checkmark next to any other weeks (if any) that you'd like to publish as well.
A maximum of three weeks can be published at a time.
-
Click on the button.
-
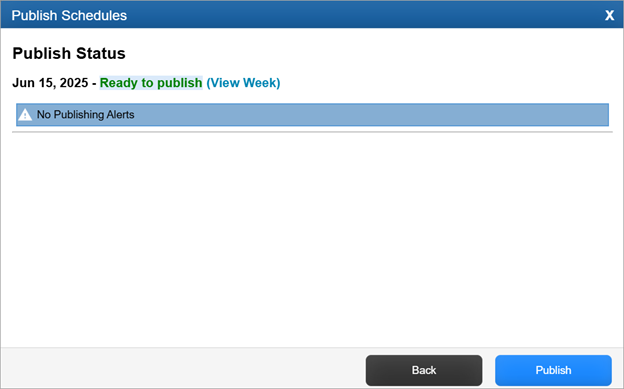
Check the notifications displayed and address them if required.
Blue (information) and yellow (warning) notifications provide insight into possible issues with the schedule but will not prevent you from publishing. On the other hand, orange (critical) notifications must be addressed as they prevent CLEARVIEW from publishing the schedule.
-
Click on the button.

![]()

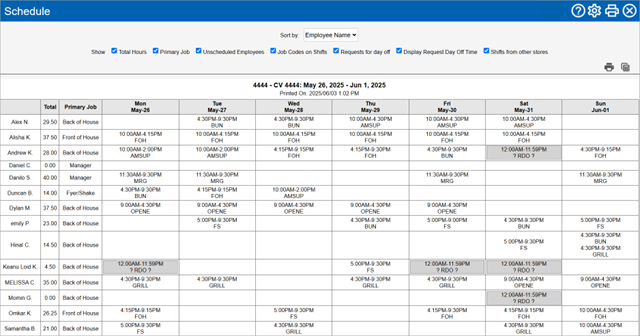
The weekly schedule can be printed so you can post it for your team. The print function proves several options to determine what will be included in the printed version.
To print the created schedule:
-
Click on
 in the top-left corner of the page.
 -
Click on the Print button.

-
In the Schedule window:

-
Select how you'd like the schedule sorted from the Sort by drop-down list:
-
Place a checkmark next to each of the details you want included in the print:
-
Total Hours will include the total hours scheduled for each employee for the week in a column titled Total.
-
Primary Job will include the Primary Job of the employee as a column.
-
Unscheduled Employees will include employees that have not been scheduled any hours for the week in the print.
-
Job Codes on Shifts will include the initials of the job code assigned to each shift.
-
Requests for day off will indicate the days that employees have requested off in grey boxes.
-
RDO indicates that the leave request has been approved.
-
? RDO ? indicates that the leave request has not been approved as yet.
-
-
Display Request Day Off Time will include the time period requested off in Requests for day off.
-
Shifts from other stores will include shifts that employees are scheduled at another store, in the print. Shifts from other stores are indicated with a striped background.
-
-
Click on
 and follow the printer prompts.
-