
Create and Submit a Purchase Order
Purchase Orders allow you to create and manage orders for inventory items from your suppliers. You can add products to an order manually, or use Suggested Ordering, which calculates optimal quantities based on past data.
With integrated suppliers, you can send your purchase order to them directly through CLEARVIEW, simplifying the entire process from start to finish.

CLEARVIEW provides you with multiple options to determine your PO Purchase Order order quantities:
-
Manual:
-
Manual Entry: Lets you manually enter the quantities for each supplier product An inventory item in a package size available from a particular supplier. that you want to order.
-
Manual Build To's The stock level that must be met through purchases.: CLEARVIEW will calculate the difference between the stock level that you'd like to build each supplier product An inventory item in a package size available from a particular supplier. to, and your present actual stock level (on hand). (The stock level to build to must be entered on the Purchase Order Build to's page in advance.)
-
-
Suggested ordering: A nifty feature by CLEARVIEW that calculates your build-to's automatically (click here to learn more).
TO CREATE A PO USING THE MANUAL OPTION:
-
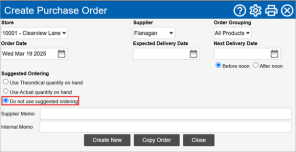
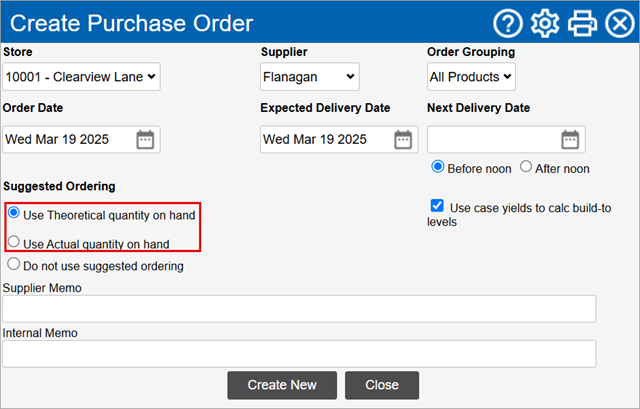
Open the Create Purchase Order page.
-
Select the Area* and Store from the drop-down list(s).
-
Select the Supplier from the drop-down list.
-
Select the Order Grouping from the drop-down list if required.
Order grouping is preset groups of supplier products that are normally ordered in the same PO Purchase Order.
Click here to learn how to create or edit an order group in Suppliers.
-
Select the Order Date for the PO Purchase Order from the drop-down calendar.
-
Select the date on which the supplier is expected to deliver the order from the Expected Delivery Date drop-down calendar.
This date will be auto-populated if the delivery schedule for the supplier is available in CLEARVIEW.
Click here to learn where to find the delivery schedule for the Supplier.
-
Select the next day the supplier generally delivers from the Next Delivery Date drop-down calendar and select whether the delivery happens before noon or after noon.
This date will be auto-populated if the delivery schedule for the supplier is available in CLEARVIEW.
Click here to learn where to find the delivery schedule for the Supplier.
-
Select Do not use suggested ordering from the Suggested Ordering options.
-
Enter any notes to the supplier in Supplier Memo if required.
-
Enter any notes for internal use in Internal Memo if required.
-
Click on the Create New button.

-
To use Purchase Order Build to's:
-
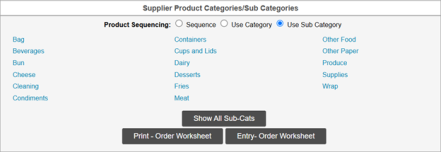
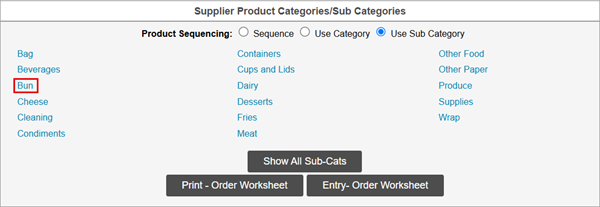
If you'd like to print the supplier's product list so that you can enter the inventory on hand (present physical count) click on the Print - Order Worksheet button.
-
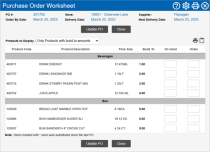
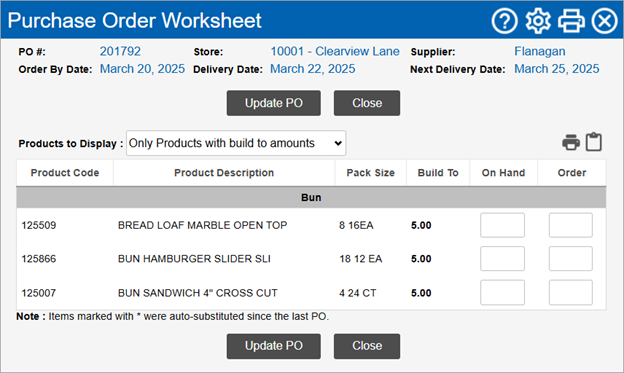
In the Purchase Order Worksheet window:
-
Use the filter Drop-down boxes that let you select from the options available. to select which Products to Display.
-
Click on the Print Worksheet button.
-
Click on the Close button.
-
-
Click on the Entry- Order Worksheet button.
-
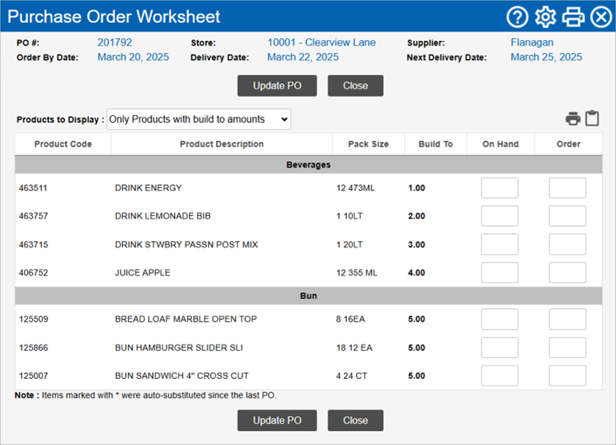
In the Purchase Order Worksheet window:
-
Enter the inventory On Hand. The order quantities will automatically populate in the Order column from the purchase order build to's for the period.
-
Check the Order quantities and change them if required.
-
Click on the Update PO button.
-
-
-
To enter order quantities freestyle:
-
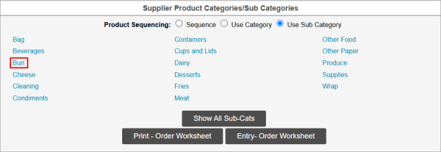
Click on the name of a category or sub-category for which you want to enter the order quantities.
-
In the PO Product List window:
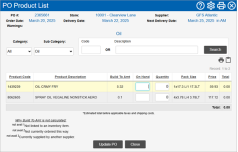
-
Enter the Quantity to be ordered for each of the supplier products.
-
Click on the Update PO button.
-
-
-
 To include supplier products that aren't set for regular orders:

 to print the
  to export the PO
-
The Changes since last PO button takes you to the Supplier Product Audit page.
-
To quickly view all products supplied by the supplier but not ordered in the PO Purchase Order, click on the View Items not Ordered button.
TO CREATE A PO USING SUGGESTED ORDERING:
The order quantities will be calculated only for supplier products that have the Show On PO control turned on:
Click here for instructions on how to activate/deactivate the Show On PO control in Supplier Products.
-
Open the Create Purchase Order page.
-
Select the Area* and Store from the drop-down list(s).
-
Select the Supplier from the drop-down list.
-
Select the Order Grouping from the drop-down list if required.
Order grouping is preset groups of supplier products that are normally ordered in the same PO Purchase Order.
Click here to learn how to create or edit an order group in Suppliers.
-
Select the Order Date for the PO Purchase Order from the drop-down calendar.
-
Select the date on which the supplier is expected to deliver the order from the Expected Delivery Date drop-down calendar.
This date will be auto-populated if the delivery schedule for the supplier is available in CLEARVIEW.
Click here to learn where to find the delivery schedule for the Supplier.
-
Select the next day the supplier generally delivers from the Next Delivery Date drop-down calendar and select whether the delivery happens before noon or after noon.
This information is essential for suggested ordering Ordering quantities calculated by Clearview to meet forecasted demand until the next supplier delivery date, without carrying too much inventory. as the calculations take into consideration the quantity of inventory required to secure you until the next delivery.
This date will be auto-populated if the delivery schedule for the supplier is available in CLEARVIEW.
Click here to learn where to find the delivery schedule for the Supplier.
-
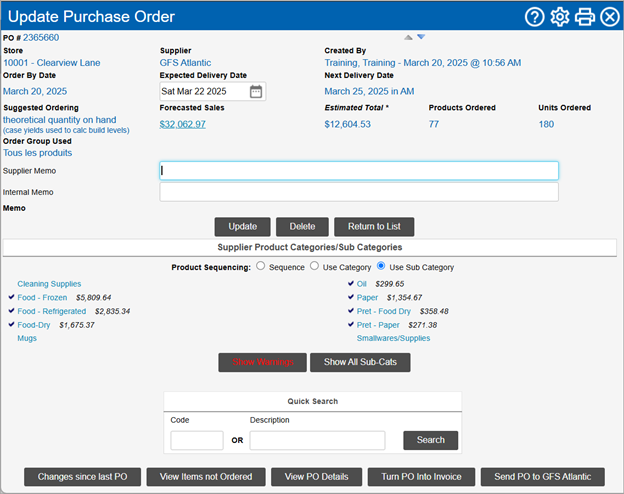
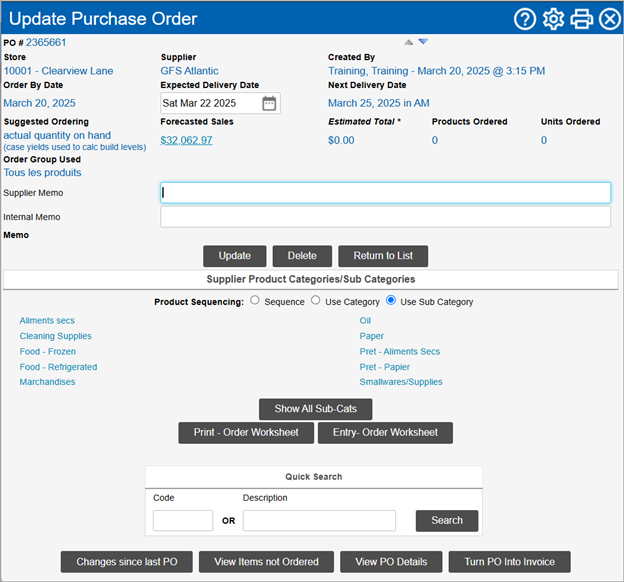
Select whether you'd like to Use Theoretical quantity on hand or Use Actual quantity on hand for Suggested Ordering.

Setting up theSales Yield Worksheet is a prerequisite for creating a PO Purchase Order using suggested ordering Ordering quantities calculated by Clearview to meet forecasted demand until the next supplier delivery date, without carrying too much inventory.. Should you select suggested ordering Ordering quantities calculated by Clearview to meet forecasted demand until the next supplier delivery date, without carrying too much inventory. using theoretical quantity or actual quantity and don't have the Sales Yield Worksheet set up, an error will display followed by a Create Sales Yield Worksheet button.
Click on the Create Sales Yield Worksheet button and then click here to learn how to set it up.
-
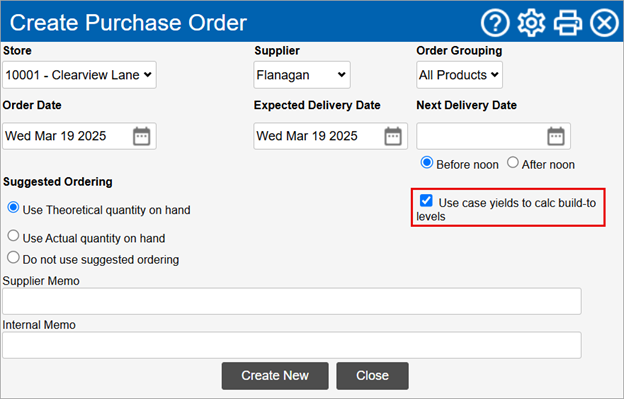
Select whether you want to Use case yields to calculate build-to levels.

Placing a checkmark in the box will override the Use Forecasted PLU Build To's control set for each individual item on the Inventory Item Information page, and removing the checkmark will apply the control set for each item instead. Click here to learn what the difference is between case yields and forecasted PLU Product Look-Up code is the numeric code used in Point of Sale systems to identify a menu item that is sold to a customer..
-
Enter any notes to the supplier in Supplier Memo if required.
-
Enter any notes for internal use in Internal Memo if required.
-
If a forecast hasn't been created for the entire period required for the calculations, a table will show requesting you to manually enter the expected sales. Either enter the sales forecast or create a forecast for the period required.
-
Click on the Create New button.
-
Use Theoretical quantity on hand:
When using theoretical quantity on hand, all data entered into CLEARVIEW must be accurate and up-to-date for the suggested ordering Ordering quantities calculated by Clearview to meet forecasted demand until the next supplier delivery date, without carrying too much inventory. quantities to be accurate.
-
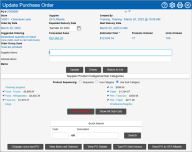
Select the order in which you'd like the items to be displayed in Product Sequencing.
This order can be changed later on the PO Product List page as well.
-
Click on the Show All Categories/Sub-Cats* button or on the name of the category or sub-category that you want to view/edit.
-
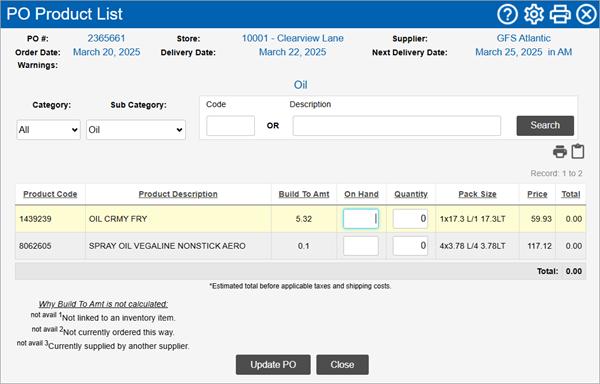
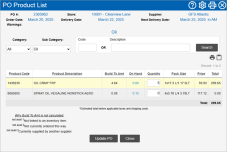
In the PO Product List window:
-
Check the suggested ordering Ordering quantities calculated by Clearview to meet forecasted demand until the next supplier delivery date, without carrying too much inventory. figures in the Quantity column for the items and change them if required.
The Build To Amt column contains the expected quantity required to meet demand until the next delivery date.
-
Click on the Update PO button.
-
-
-
Use Actual quantity on hand:

-
If you'd like to print the supplier's product list so that you can enter the inventory on hand (present physical count), click on the Print - Order Worksheet button.
In the Purchase Order Worksheet window:
-
Use the filter Drop-down boxes that let you select from the options available. to select which Products to Display.
-
Click on the Print Worksheet button.
-
Click on the Close button.
-
-
Click on the Entry - Order Worksheet button or on the name of a category or sub-category to enter the on hand counts.
-
In the Purchase Order Worksheet* or PO Product List* window:
-
Use the filter Drop-down boxes that let you select from the options available. to select which Products to Display* is available.
-
Enter the inventory On Hand. The order quantities will automatically populate in the Order* or Quantity* column.
The inventory on hand figures entered here are only used for the purchase order and will not affect the physical count data stored in CLEARVIEW.
-
Check the Order* or Quantity* quantities and change them if required.
-
Click on the Update PO button.

-
-
-
To include supplier products that aren't set for regular orders:

-
The Changes since last PO button takes you to the Supplier Product Audit page.
-
To quickly view all products supplied by the supplier but not ordered in the PO Purchase Order, click on the View Items not Ordered button.